A sudden bang on drywall from any person or an object immediately requires a patch and repair of drywall. It is tough to repair a big hole rather than a small one. Why? Because larger holes require tough materials to cover the holes. Especially, quick repairs are needed for projects that need renovation or are damaged for some reason.
DIVE IN TO DISCOVER HOW TO PATCH AND REPAIR DRYWALL HASSLE-FREE WITH THE REQUIRED TOOLS AND MATERIALS!
Which materials are necessary?
Before patching and repairing drywall, you must have the following materials to execute the process correctly.
- Scrap lumber or plywood strips, at least 3 inches wide
- Framing square
- Pencil
- Drywall saw
- Tape measure
- Wood saw
- Drill with screwdriver bit
- 6-inch drywall knife
- 150-grit sanding sponge
- Rag
- Paintbrush
- Materials
- Piece of drywall (thickness must match drywall in repair area)
- 1 1/4 inch coarse-thread drywall screws
- Self-adhesive mesh drywall joint tape
- Drywall joint compound
- Primer
- Paint
Steps to patch and repair drywall!
Step#1 Measure the openings
Start with the correct measurements of the space that needs patching. Trim all the sides of the hole in a straight form or in a square shape. For that, you can use a ruler and a pencil to prevent zig-zag lines. Now, follow the straight lines and cut them with the saw.
The next step is to measure the open space after you have cut it.
Step#2 Install Supporting Plates
Now, you need to cut the longer two pieces of wood to install it as a supporting plate behind the cutting. You need to place these two plates parallel to each other in the hole. It helps to give support behind the drywall.
Now, you need them to stay in their positions, so use drywall screws and drive through the wall. For both plates, the same process must be repeated!
Step#3 Drywall Patching
For patching, you need to cut a piece of drywall and install it into the hole. It is not necessary that the patching must be a firm fit.
Just use the screws and secure the patch over the holes.
Pro Tip: You need to keep the screws 1 inch from the patch edges and space them 6 inches apart from each other.
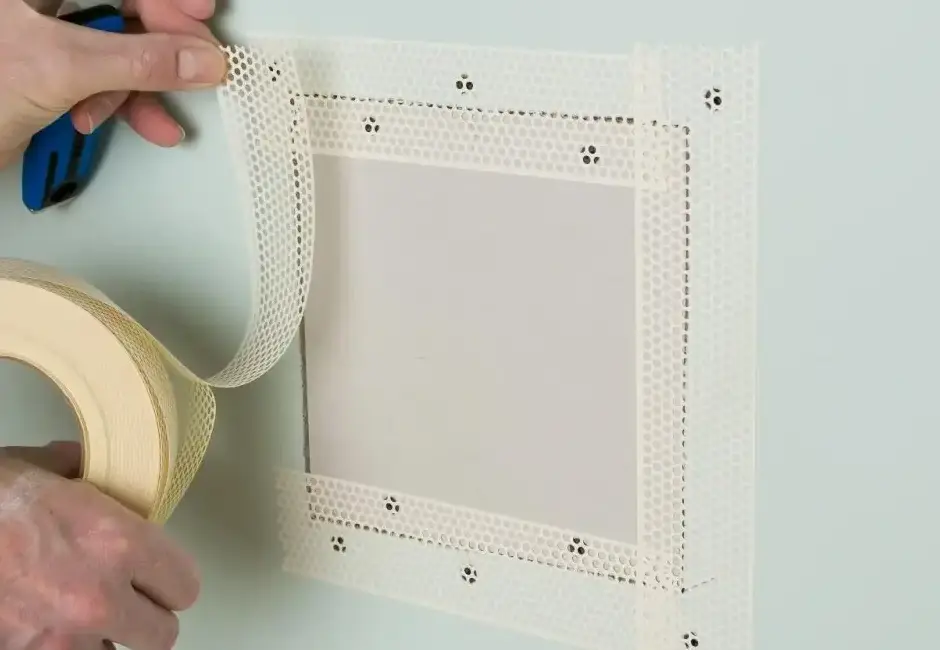
Step#4 Tape Seams
Now, the next step is to cut the strips of joint tape with a knife according to the length required. In this step, you must be assured that no bulges are there in the tape, it must be flat.
Step#5 Use drywall joint compound
Use a compound to cover the tape by using a knife, which may be 6 inches. How would you know that everything is perfect? However, the mesh should be seen through the compound!
When the compound is dried, graze the surface to avoid clumps on the surface. In the same way, apply the second and third layers after they get dry.
Step#6 Sanding
The next step is to sand the dried compound to make the surface smooth. Do not get hard on the surface; it may cause the mesh tape to be visible.
Step#7 Paint the Patch
Now, you need a paintbrush to cover the entire patch area with a coat of primer.
Wait, until the primer is dried, now apply more than two coats of paint to match the surroundings. This way, you will get the desired results under all circumstances!
CONTACT OUR DRYWALL ESTIMATING TEAM IF YOU ARE WORKING ON HIGH-SCALE PROJECTS, AND WE WILL PROVIDE YOU WITH A DETAILED COST BREAKDOWN OF EVERY ELEMENT!
Final Words
To sum it up, patching and repairing drywall steps are not that difficult to perform. The main thing is to follow every step with care and not mingle the steps. Follow our guidelines to repair your drywall and finish your job without hiring an expert!